Archive for the ‘content management’ Category
- In: content management | drupal | PHP
- 8 Comments
Drupal’s module installation system makes it very easy to extend and customise Drupal sites and to disable and re-enable modules quickly and non-destructively. However, the default way Drupal’s treats modules can get in the way during development.
When building your own modules, it’s common for database table structure to change as project needs become clearer, or even for modules to be built in a “front to back” fashion – where the admin screens and the UI interaction skeleton is built before the underlying processing and data storage code is developed (or finalised).
If this is the case, you may find yourself building an install file late in module development and then wondering why Drupal seems to dutifully ignore it.
Despite being counter-intuitive, this behaviour has some clear benefits. Previously installed modules may have attached database tables, and these tables may still hold valid application data. Drupal’s behaviour ensures that these tables aren’t destroyed when the module is disabled. The module can then be re-enabled later without any data destruction.
To get a module to run an install file, or to re-install successfully, you need to do more than just disable and re-enable the module on the module list screen (/admin/build/modules). This is beacuse Drupal keeps a record of previously installed modules and won’t reinstall them if they are merely disabled and re-enabled.
The trick to getting your new / updated install file to run is to remove the modules entry from the system database tables. If your module has already created one or more tables, and you want the table structure to be altered or rebuilt, you may also need to remove these tables before re-enabling the module.
Once you’ve disabled your module, removed the related entry from the system table and removed any module-related tables, you can re-enable the module and your install file will be run correctly.
- In: content management | frameworks | PHP
- 22 Comments
It has somewhat of a steep learning curve, but Drupal is amazing for allowing you to build flexible, complex websites with lots of functionality in very little time.
For a site I’m working on, we had several custom content types coming through the default node template (node.tpl.php) in our customised theme.
This was fine and dandy for quick development, but then the time came to customise the node page for each content type.
First things first, you need a custom node template. Save the node.tpl.php file as node-[your node name].tpl.php and you’ve created a custom node template. (This means if your node type is ‘audio’, you’d save the file as node-audio.tpl.php)
Now we need to customise the template to suit our needs.
If you dive into a standard node template you’ll see something (unhelpful) like this where the content goes:
<div class=”content”>
print($content)
</div>
Um, OK. So how do you get at the functions which compile the content before it gets to this stage? Well, you probably can, but the easier way is to avoid this step and just access the default $node object which drupal gives you access to with each ‘page’.
To find out what’s hiding inside the $node object, simply do something like this:
print_r($node);
(Yes, I like print_r())
The resulting cacophony in your page source will show you all the node attributes and properties you have access to. Chances are you’ll be able to access these directly to create the customised node template you need.
As a follow up to the previous release, I’ve put together another plugin for the Expression Engine content management system.
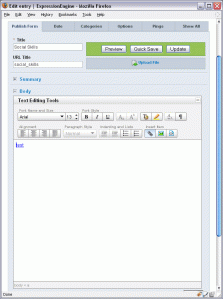
This one adds the full YUI rich text editor to the ‘body’ area of the Expression Engine publish / edit interface.
The YUI simpleEditor is nice and everything, but sometimes it’s a bit too … simple.
Get the full plugin from the nice folks at Google Code:

recent comments